🌐 Domains
In Domains section, you can manage all the custom domains you have added to swiftwave.

Register a new domain
You can click on Register New button and fill in the required details to register a new domain.
Delete a domain
You can click on Delete button to delete a domain.
Note : You can only delete a domain if
- it is not being used by any application
- no ingress rules linked to it
- no redirect rules linked to it
Verify DNS
You can click on Verify DNS button to verify if domain is correctly pointing to the proxy server.
- If you are using cloudflare as your DNS provider, it is recommended to use DNS only mode while mapping your domain to the proxy server IP.
- If you want to use Cloudflare Proxy Mode, go to
Domain SSL/TLS Modesection and markEncryption ModetoFull. After this, all your application hosted on swiftwave should usehttpsprotocol in all ingress rules.
Note: To use the Verify DNS feature, ensure that Enable Ingress Proxy is turned on for the server.
Issue SSL Certificate 🛡️
You can issue a SSL certificate automatically via Let's Encrypt or by manually providing SSL certificate and private key.
-
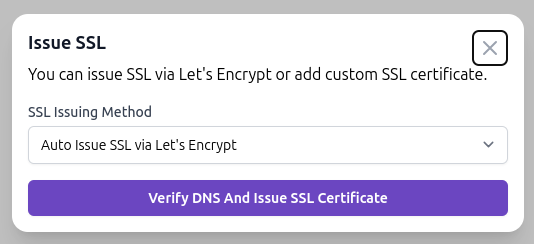
Issue Automatically via Let's Encrypt
Swiftwave has Let's Encrypt integration. You can issue a SSL certificate for your domain by clicking on
Issue SSLbutton. tip
tipIf you issue SSL certificate via Let's Encrypt, you don't need to worry about renewing your SSL certificate manually. Swiftwave will automatically renew your SSL certificate before it expires.
-
Add Custom SSL Certificate
-
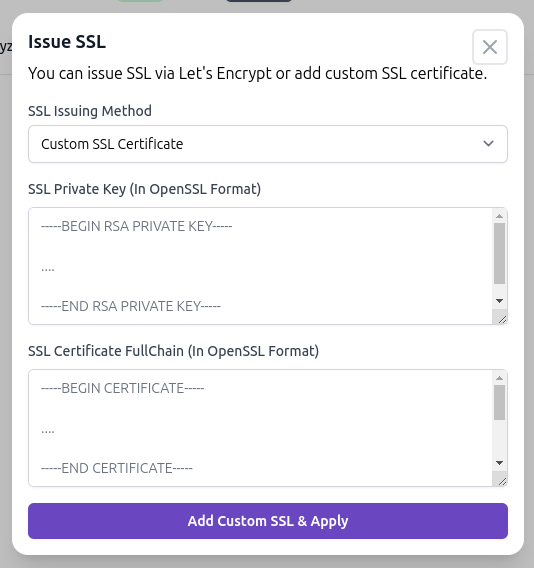
Click on
Issue SSLbutton. -
Choose
Custom SSL Certificateoption.
-
Now, provide your SSL certificate and private key in valid OpenSSL format.
🤝 Need help to generate self-signed SSL certificate ?
You can run following command to generate private key and self-signed certificate.
openssl req -x509 -newkey rsa:1024 -keyout key.pem -out cert.pem -sha256 -days 365 -nodes -
Submit and done !
-
It will take few minutes to apply the changes.
warningYou should only use this option
- if you can't open your server's port 80 and 443 to the internet due to security reasons.
- Also, you may have purchased SSL certificate from a third party and you want to use it.
- If you just want to use self-signed certificate, you can go with this option.
-